Have you ever watched those tiny house shows on TV, and thought to yourself I could totally do that? I mean it’s only about a couple square feet how challenging could it really be to flip a van? As I mentioned in my first blog, I AM A “DOER,” meaning when an exciting idea pops into my head I have to go out and make it happen. The life of a “doer” has its ups and downs, but in this case I’m glad I can be a bit impulsive, because the story of Yolanda, the great camper-van, is a chapter in my life I will never forget!
The story began in the spring of 2017, when I was in Fort Sill, Oklahoma for Basic Training and AIT (Advanced Individual Training). When you are in military training and deprived of cellphones the only thing you really can rely on is your imagination. When times were tough I dug deep into my imagination/happy place, and guess where it was? Oh yes, the open road. There is just something about driving aimlessly across the country with the windows down that screams FREEDOM. Which was the only anthem I longed to roll around in. I graduated AIT in May of 2017, just in time for summer. A summer where I was determined to take on a project of a lifetime.
 When I arrived back home I started scrolling through Craigslist to see the latest posts for vans/camper-vans available. I must have really lucked out, because it only took one time scrolling on Craigslist to find the van of my dreams. The van was located about 2 hours from where I lived, and my dad was gracious enough to meet up with me to check it out. I knew we had arrived in the right place when I saw a large Napoleon dynamite-type van hogging up half the driveway! I was freaking out, this van was everything I had envisioned. For some, it may have looked like a ginormous eye soar, but to me it was the most magnificent van I had ever seen! I told the man named Dave, I was all in and I’m taking this baby home tonight.
I agreed to purchase the 1983 Chevy Camper Van for $1,700. The only complication was that I didn’t have that kind of cash on me…or my bank 
account, to be honest. So, we worked out an agreement and he let me pay him in increments over the next following months. Dave also gave me a set of power tools, and a bunch of supplies to help get me started! I was feeling lucky again, until my mom, love her to death, said I can’t bring that dinosaur of a van home. She said our neighborhood would have a fit. Of course, it irked me to the highest extreme, but I really didn’t have a choice in the matter. So, I frantically made some phone calls to find a place to park my new van, Yolanda.
Fortunately, my childhood friend’s family agreed to let me park and live at their farm for the summer while I fixed up the van, and I couldn’t have been more grateful. I mean how cool was it that I got to stay at my best friend’s house and live out of a van?
Now that you know the background story of Yolanda, let’s talk about what it was like to fix her up. Yes, it’s a girl!
Alrighty y’all, it’s confession time. I HAD NO IDEA WHAT I GOT MYSELF INTO. I never even used a screwdriver, and now I had a whole van to gut and remodel. To calm my nerves, I refocused my attention on smaller projects and avoided looking at this clunky-hippy van as a whole. I worked my way from the outside of the van to the inside.
 I spent about two weeks working on the outside, between bondo-ing (the white putty on the side of the van in the picture), to smoothing out the surfaces, then to top it all off I added 4 layers of paint to all sides of the van. Not to mention it rained a couple times in between coats, which is why this process took around two weeks. Talk about frustrating, but anyways I used a convenient store, all-weather-proof, automobile spray-paint. At some angles it looked a little streaky, but the results were unarguably better from what I had to start with.
Now that we talked about Yolanda’s outside repairs, let’s get into the interior of the van. As you can see in the before pictures the iconic orange shaggy carpet had grown a layer of mold under it through the years. So we had to gut the
flooring completely and install linoleum flooring. It was much more reasonable for cleaning, and it was easier to maneuver, especially with the van layout. I was blessed enough to have a friend of mine line the boarders with wood trim, to clean up the edges. The flooring was overall probably the most time-consuming process, but the results definitely paid off.
Next, were the hideous cabinets. When painting any wooden furniture or wooden surface, it’s important to use sandpaper to roughen and toughen it up. Utilizing sandpaper will help the paint cling to the surface and appear less streaky. All I used was a small can of aqua blue paint I found at the local super-mart. The cabinets took three coats and about a week to complete. I also painted some of the walls inside with the same aqua color.
Moreover, talk about make-shift remodeling. I just used a grainy charcoal spray-paint to cover up the dingy-yellow countertop surface. This is a great, cost-efficient solution to fix up countertops, especially for tiny living conditions.
For the entirety of the bare wall space, I couldn’t stand the fake cabin-looking wood, so I bought a couple rolls of vinyl wallpaper. I totally recommend using vinyl wallpaper. The roll it comes in has a sticky side to it, so it’s just like putting a giant sticker on the wall. It’s slightly tedious, because air bubbles are likely to arise when it’s such a large surface. Just take your time, the results will all be worth it… I promise.
Among the flooring, cabinets, countertops, and walls, that’s all it took to bring Yolanda back to life! As for the orange striped benches in earlier pictures, I just kept the benches in the down position and put a memory foam mattress on top of them. Lastly, I found some reasonable bedding online that conveniently matched my aqua/silver theme. I positioned the bedding and pillows over the top of the flat benches and bam… I now had a bed!

In conclusion, I couldn’t have asked for a better summer project. I was no longer afraid of power tools, I got to use my creativity for some interior design, and how many people can say they lived inside of a van at their best friend’s farm for the summer? I felt like a true happy hippie and I couldn’t wait for what travels I had a head of me. Which I will write about in blogs to come! The total costs for fixing up Yolanda were estimated around $2,500.00, which to me, was worth every penny.
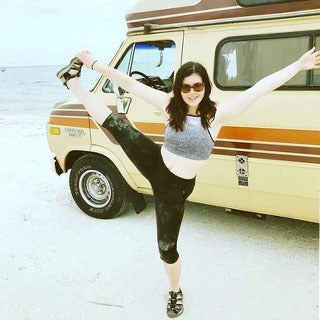
If you are considering jumping on the van-life train, I recommend just going for it! There are so many ways to experience tiny living, whether it’s a tiny home or a camper it’s something I believe everyone should experience at least once in their lifetime. Try not to let the big picture of a fixer-upper frighten you, and instead take it step by step. Remain open to ask for help from others and know that it’s okay to not know what you’re doing. After all, that’s what friends and family are for! Here is a picture of a very happy camper-van named Yolanda, and one last shout-out to all the people who helped my dreams come true!

146 comments
YIuHBmbeqFLj
zoaEqkhMNLOAWYJF
oGXIYJsAxyH
rKqdSphQkXf
kSKEvIbi